| ::sfu>ensc>ramp>mpk | |||||||||||||||||||||||||||||||||||||||||||||||||||||||||||||||
|
MPK-Home Architecture Components Publications Demo Program Videos Downloads Contributors Reference Development |
MPK Demo GuideInstallation and SetupDownload Demo PackageFrom the download pages. System Requirements
Setting up the demonstration to run is quite simple. Unzip the files in the archive to an empty directory. The demo is run by executing Mpkgui.exe Directory StructureThe root directory of the package contains saved example MPK scene files (*.mpk). Other sub-directories include:
CapabilitiesThis demo package shows different components in MPK. Please refer to Components page for more detailed description of different components. The following is a list of components that have been bested, and known to function. Others are not fully-tested, and they are either out-of-date, or under development, and may not function well in all circumstances. Planners
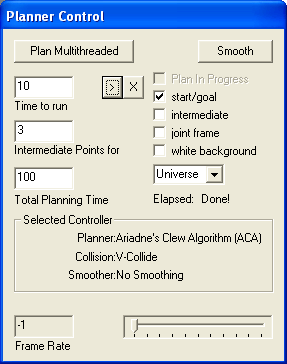
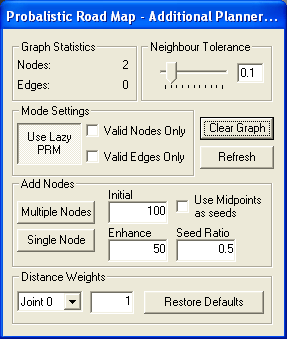
Create ScenesCreate your own scenes.Check out here. Saved Scenes(*.mpk)The easiest way to operate the MPK is to load up one of the saved examples that have been prepared. These examples contain a robot and some obstacles. A planner and a collision detector have been preset, and the planning task is complete. Generally the camera has been set up to provide a good view of the robot’s path. Saved examples can be loaded by accessing the File menu, and choosing Open. Add Temporary Obstacles.Obstacles in the environment can be loaded from a VRML file by choosing menu, Obstacle->Load From File. There is another way to add some temporary obstacles by double-clicking at where you want to add an obstacle. Please note that since the added obstacle is a 3D cylinder, when you have a tilted camera (i.e., different X, or Y value in camera Position and Lookat, see Camera/View Control section), such a cylinder may be added to an unexpected position. User ControlsGeneral Planner ControlThe interface of general planner control is shown in Figure 1, and descriptions of different controls on the dialog are as follows. Planner Specific Control For each planner, there may be some planner-specific parameters. For those planners that expect users to set these parameters, another toolbox will show up. In order to set reasonable parameters, users may need a certain knowledge of that particular planner. For instance, once you choose the PRM planner, a toolbox as shown in Figure 2 will show up.
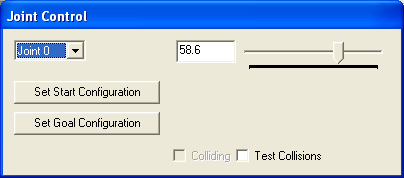
Robot Joint Control The interface of robot joint control is shown in Figure 3.
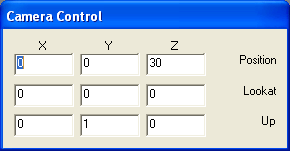
Camera/View Control The interface of camera/view control is shown in Figure 4. It allows you to specify camera parameters that will affect the way the scene is drawn. Position represents the XYZ coordinates of the camera’s position in Cartesian space. Lookat represents the XYZ coordinates of the center of projection. Up represents the vector that the camera uses to orient it’s twist (generally Up should be left alone). Moving the position will have the most effect on the view. Try making the magnitude of Position smaller for a zoom in effect. The MPK uses a Right handed coordinate system, where by default +X is to the right, +Y is up, and +Z is out of the screen towards the user. Camera/view control by keyboard is also possible, as shown in the later section.
Keyboard Commands Keyboard shortcuts are also defined for some common commands for joint control, and camera control.
|
||||||||||||||||||||||||||||||||||||||||||||||||||||||||||||||
| Updated on Aug, 2009 by Zhenwang Yao . | |||||||||||||||||||||||||||||||||||||||||||||||||||||||||||||||

|

|


